

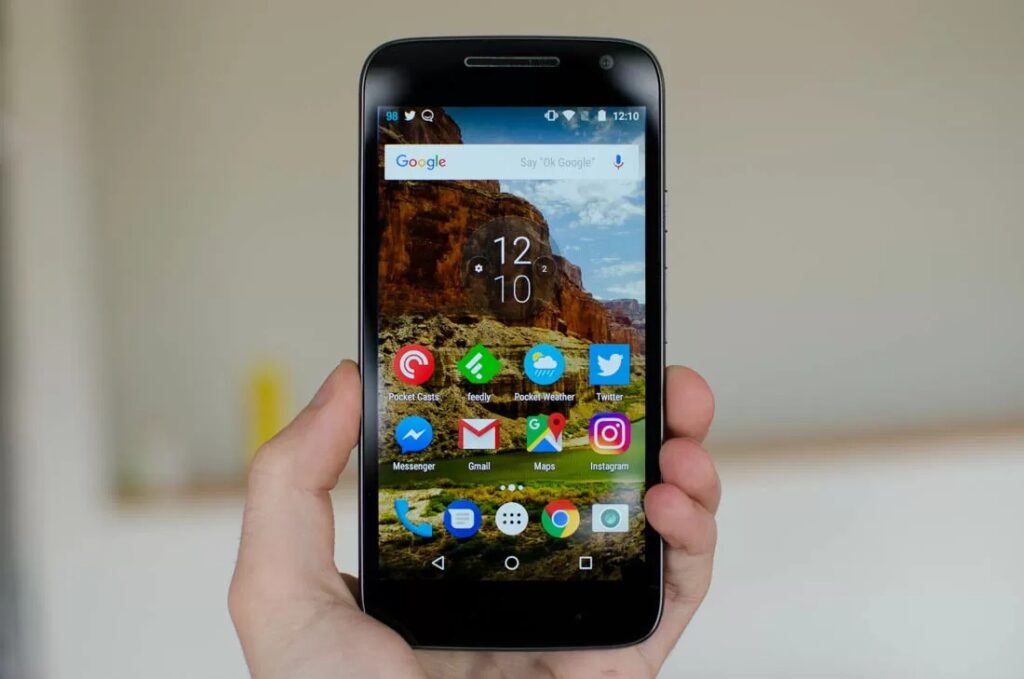
Before you flash: Flashing firmware will erase all data on your device. Back up contacts, photos, and apps before proceeding. FlashGuideHub is not responsible for any damage caused by following this guide.
About the Motorola Moto G4 Play
The Motorola Moto G4 Play (codename: harpia) is a budget Android smartphone released in May 2016, powered by the Qualcomm Snapdragon 410 (MSM8916) chipset. Motorola distributed it across seven XT hardware variants, each targeting a different region or carrier network.
Each XT variant carries a unique radio (modem) firmware — using the wrong variant's image is a permanent error. The Prerequisites and Firmware Package sections below explain how to identify your variant and select the correct firmware before you begin.
Which Flash Mode Should You Use?
Fastboot (Factory Image)
The standard method for the Moto G4 Play. Writes every partition — bootloader, radio, system — in one automated pass via Google's open bootloader interface. Requires a prior bootloader unlock. Erases all user data.
Motorola Rescue and Smart Assistant
Motorola's official PC-based rescue tool can re-flash the device in certain scenarios and may not require a manually unlocked bootloader. Download from Motorola's support site, connect the phone via USB, and follow the on-screen instructions. Limited to Motorola-approved firmware versions and may not cover all XT variants or older Android versions.
EDL / QFIL (Emergency)
The Snapdragon 410's Emergency Download mode is accessible by shorting EDL test points when the device is fully unresponsive. Requires Qualcomm programmer files not publicly distributed by Motorola. Not a standard user-accessible path — used only by service centres with proprietary tools. If Fastboot and Rescue and Smart Assistant both fail, contact Motorola support directly.
What You Need Before Flashing
Required to run ADB/Fastboot commands and the flash-all script. Install Android SDK Platform Tools from Google's developer site to get the fastboot binary. Motorola USB drivers are required on Windows for the device to be recognised in Fastboot mode.
Fastboot flashing is only possible with a previously unlocked bootloader. Request your device-specific unlock code at motorola.com/us/unlock-bootloader using your IMEI and Android ID. The unlock process permanently wipes the device once — complete this before downloading firmware.
Download the factory image ZIP that matches your exact XT model number. Confirm in Settings → About Phone → Model Number. The wrong XT variant's image contains a different radio firmware and will corrupt cellular connectivity permanently if flashed.
A data-capable USB cable is essential — charge-only cables do not support Fastboot communication. Use the original Motorola cable or a known-good data cable. Avoid USB hubs; connect directly to a port on your PC.
The flash script writes multiple partitions over several minutes. A power-off during radio or bootloader partition writes can cause a permanent brick. The 2800mAh battery is removable — charge it to at least 30% before starting, and keep the USB cable connected throughout.
Both the bootloader unlock step and the flash-all script wipe all user data. Back up photos to Google Photos, contacts to Google Contacts, and app data or documents to a PC or cloud service before beginning.
How to Flash the Motorola Moto G4 Play — Quick Overview
These 7 steps are tailored to the Motorola Moto G4 Play (Snapdragon 410). For screenshots, an interactive checklist, and troubleshooting, open the full Fastboot guide.
-
Identify your exact XT variant and carrier build
-
Request your bootloader unlock code and back up all data
-
Download the firmware package matching your XT + carrier build
-
Install ADB/Fastboot tools and Motorola USB drivers
-
Boot into Fastboot mode and run the flash script
-
Wait for completion and confirm IMEI/network on first boot
-
Re-lock the bootloader if you want official OTA updates (optional)
Finding the Firmware Package for MSM8916
The Moto G4 Play firmware is distributed by Motorola as a factory image ZIP archive containing separate .img files for each partition plus a platform-specific flash script. After extracting the factory image archive, locate:
flash-all.bat
This script is inside the factory image ZIP. After extracting the archive, look for flash-all.bat (Windows) or flash-all.sh (Linux/Mac) at the top level of the extracted folder. The same folder will contain individual .img files for each partition. Do not run the script from inside a compressed archive — fully extract to a folder on your PC before executing.
The Moto G4 Play (codename: harpia) has seven XT hardware variants, each further split into multiple carrier-specific builds (e.g. VZW, TIMBR, RETUS, WOMCL) with their own radio (modem) firmware and CID (Carrier/Config ID): XT1600 (Brazil), XT1601 (Global/International — Europe, India, Canada, plus Mexico and Latin American carrier builds), XT1602 (Latin America / Dual SIM), XT1603 (Verizon USA), XT1604 (Cricket Wireless / AT&T GoPhone USA, plus UK carriers Vodafone/O2/Tesco/Three/Orange), XT1607 (TracFone / Consumer Cellular / Straight Talk / U.S. Cellular / Amazon USA), and XT1609 (Boost Mobile / Sprint / Virgin Mobile USA). Always match both the XT number and the carrier code in the filename — two builds can share an XT number and Android version yet still carry different, incompatible radio images.
Before flashing, run fastboot getvar all to read the device's current CID — this confirms which carrier/region package is actually compatible, since a phone's outward branding does not always match its provisioned CID. Flashing a CID-mismatched package is the most common cause of a "Preflash validation failed" bootloader rejection (see Common Errors below).
Firmware packages from third-party repositories (such as firmwarefile.uk) may include a flashfile.bat and flashfile.xml, or a CFC.xml-based package, in place of flash-all.bat — all three approaches work the same way once extracted.
Note: The Moto G4 (XT1622/XT1625) is a different, larger 5.5-inch device. Its factory images are incompatible with the 5.0-inch Moto G4 Play (harpia). Never flash G4 images on a G4 Play or vice versa.
Motorola Moto G4 Play Firmware Versions
Known stock firmware releases for the Motorola Moto G4 Play. Always verify the version matches your device region before flashing.
| Version | Region | Build Date | Size | Download |
|---|---|---|---|---|
MPI24.241-2.35-1 / CID50 |
XT1600 — harpia (CID50) | Android 6.0 | 1.02 GB | ⬇️ Download |
NPIS26.48-43-2 / CID50 |
XT1600 — harpia (CID50) | Android 7.1.1 | 874 MB | ⬇️ Download |
NPIS26.48-43-2 / cid50 |
XT1600 — TIMBR | Android 7.1.1 | 855 MB | ⬇️ Download |
NPIS26.48-43-2 / cid50 |
XT1600 — TEFBR | Android 7.1.1 | 855 MB | ⬇️ Download |
NPIS26.48-43-2 / cid50 |
XT1600 — OIBR | Android 7.1.1 | 855 MB | ⬇️ Download |
NPIS26.48-43-2 / cid50 |
XT1600 — AMXBR | Android 7.1.1 | 855 MB | ⬇️ Download |
MPIS24.241-15.3-7 |
XT1601 — Mexico | Android 6.0.1 | 1.02 GB | ⬇️ Download |
NPIS26.48-43-2 / CID50 |
XT1601 — harpia (CID50) | Android 7.1.1 | 874 MB | ⬇️ Download |
NPIS26.48-43-2 / cid50 |
XT1601 — WOMCL | Android 7.1.1 | 855 MB | ⬇️ Download |
NPIS26.48-43-2 / cid50 |
XT1601 — TEFCO | Android 7.1.1 | 855 MB | ⬇️ Download |
MPIS24.241-15.3-7 / cid50 |
XT1601 — RETMX | Android 6.0.1 | 1.02 GB | ⬇️ Download |
NPIS26.48-43-2 / cid50 |
XT1601 — RETLA | Android 7.1.1 | 855 MB | ⬇️ Download |
NPIS26.48-43-2 / cid50 |
XT1601 — RETCA | Android 7.1.1 | 855 MB | ⬇️ Download |
NPIS26.48-43-2 / cid50 |
XT1601 — RETAR | Android 7.1.1 | 855 MB | ⬇️ Download |
NPIS26.48-43-2 / cid50 |
XT1601 — NIIPE | Android 7.1.1 | 855 MB | ⬇️ Download |
NPIS26.48-43-2 / cid50 |
XT1601 — MOVSTLA | Android 7.1.1 | 866 MB | ⬇️ Download |
NPIS26.48-43-2 / cid50 |
XT1601 — LATAM | Android 7.1.1 | 866 MB | ⬇️ Download |
NPIS26.48-43-2 / cid50 |
XT1601 — IUSMXLA | Android 7.1.1 | 866 MB | ⬇️ Download |
MPIS24.241-15.3-7 / cid50 |
XT1601 — BELLCA | Android 6.0.1 | 1.02 GB | ⬇️ Download |
NPIS26.48-43-2 / cid50 |
XT1601 — AMXBR | Android 7.1.1 | 855 MB | ⬇️ Download |
NPIS26.48-43-2 / CID50 |
XT1602 — harpia (CID50) | Android 7.1.1 | 874 MB | ⬇️ Download |
MPI24.241-15.3 / CID50 |
XT1602 — Dual SIM (CID50) | Android 6.0.1 family | 1 GB | ⬇️ Download |
NPIS26.48-43-2 / CID50 |
XT1603 — harpia (CID50) | Android 7.1.1 | 874 MB | ⬇️ Download |
NPIS26.48-43-2 / cid50 |
XT1604 — VFGB | Android 7.1.1 | 837 MB | ⬇️ Download |
NPIS26.48-43-2 / cid50 |
XT1604 — TESCOIE | Android 7.1.1 | 866 MB | ⬇️ Download |
NPIS26.48-43-2 / cid50 |
XT1604 — RETGB | Android 7.1.1 | 855 MB | ⬇️ Download |
NPIS26.48-43-2 / cid50 |
XT1604 — ORA | Android 7.1.1 | 843 MB | ⬇️ Download |
NPIS26.48-43-2 / cid50 |
XT1604 — O2GB | Android 7.1.1 | 831 MB | ⬇️ Download |
NPIS26.48-43-2 / cid50 |
XT1604 — 3IE | Android 7.1.1 | 866 MB | ⬇️ Download |
NPIS26.48-43-2 / cid50 |
XT1607 — USC | Android 7.1.1 | 855 MB | ⬇️ Download |
NPIS26.48-43-2 / cid50 |
XT1607 — RETUS | Android 7.1.1 | 855 MB | ⬇️ Download |
NPIS26.48-43-2 / cid50 |
XT1607 — LRA | Android 7.1.1 | 855 MB | ⬇️ Download |
NPIS26.48-43-2 / cid50 |
XT1607 — CCAWS | Android 7.1.1 | 866 MB | ⬇️ Download |
NPIS26.48-43-2 / cid18 |
XT1607 — AMZ (cid18) | Android 7.1.1 | 1002 MB | ⬇️ Download |
MPI24.241-2.47 / cid50 |
XT1607 — ACG-3G | Android 6.0 family | 1.05 GB | ⬇️ Download |
NPIS26.48-43-2 / cid2 |
XT1609 — VZW (cid2) | Android 7.1.1 | 1.04 GB | ⬇️ Download |
More builds and newer regional variants may be added over time. View the source listing on FirmwareFile.uk →
Motorola Moto G4 Play — Important Notes
The Moto G4 Play officially received Android 7.1.1 Nougat for the XT1601 (global) variant and select regional builds. Not all seven XT variants received the Nougat update — several USA carrier variants remained on Android 6.0.1 as the final software version. Factory images for Android 7.1.1, where Motorola published them, can be flashed using the exact same Fastboot procedure described in this guide. Check Motorola's firmware archive for your specific XT number to confirm availability before attempting an upgrade flash.
The removable 2800mAh battery is an advantage during flashing: if the battery drains mid-process, it can be removed, charged separately, and reinserted before retrying — removing the dead-battery brick risk. However, the flash script writes the radio partition first, so a power-off during those early seconds is still dangerous; keep the USB cable connected throughout.
Common Errors on the Motorola Moto G4 Play
"waiting for device" — Fastboot does not detect the phone
Fastboot cannot see the device. On Windows, open Device Manager and check that "Android Bootloader Interface" appears when the phone is in Fastboot mode — if it shows as an unknown device, reinstall Motorola USB drivers. Use a data-capable USB cable (charge-only cables do not support Fastboot communication). Try a different USB port, preferably USB 2.0 rather than USB 3.0. Confirm Fastboot mode is active on the phone (the screen should show the Fastboot logo, not a normal Android boot screen).
FAILED (remote: 'Bootloader is not unlocked')
Fastboot flashing requires a previously unlocked bootloader. Complete the official unlock process at motorola.com/unlock-bootloader to obtain your device-specific unlock code. Boot the phone to Fastboot mode and run the command: fastboot oem unlock UNLOCK_CODE, replacing UNLOCK_CODE with the code Motorola issued. The device will wipe all data and reboot. After wiping, re-enter Fastboot mode and run flash-all.bat again.
flash-all.bat fails instantly / "Image not found" error
The flash script must be executed from within the extracted factory image folder — it references .img files by relative path. Do not double-click flash-all.bat from Windows Explorer; instead, open Command Prompt, navigate (cd) to the extracted folder, and run flash-all.bat from there. Alternatively, hold Shift + right-click inside the extracted folder and choose "Open Command Prompt here." Also verify the archive was fully downloaded — a truncated ZIP produces an incomplete extraction with missing .img files.
FAILED (remote: 'image is not for this device')
The factory image you downloaded does not match your Moto G4 Play's XT variant. Fastboot checks the device identifier embedded in the image against the phone's own hardware ID and rejects mismatches. Find your XT number in Settings → About Phone → Model Number and download the factory image archive for that exact variant from Motorola's firmware repository. Do not attempt to force-flash a mismatched image — this can permanently corrupt the bootloader or radio partition.
Device stuck on Motorola logo after flashing
A failed or interrupted flash leaves one or more partitions in an inconsistent state. Boot back to Fastboot mode by holding Volume Down + Power for 8–10 seconds. Re-run flash-all.bat from scratch with the same factory image. If the device can no longer reach Fastboot mode normally, attempt emergency recovery: hold Volume Up + Volume Down + Power simultaneously for 15+ seconds to trigger a hardware reset. As a last resort, Motorola Rescue and Smart Assistant (available from Motorola's support site) can recover some devices that are completely unresponsive to standard Fastboot commands.
(bootloader) Preflash validation failed
The bootloader rejected one or more partition images before writing them — usually because the image's signed CID (Carrier/Config ID) doesn't match the device's provisioned CID, or because the image's security version is older than what's already flashed (anti-rollback protection). Run fastboot getvar all to check the device's current CID, and only flash a firmware package built for that exact CID/carrier combination — see the firmware table below for matching builds. This is a protective check, not device damage; the fix is matching the correct package, never forcing the flash through.
IMEI reads 0/unknown or "No Service" after flashing
Almost always caused by flashing a firmware package for the wrong carrier build within the same XT number — each carrier SKU carries a distinct radio/modem image. Re-flash using the exact package matching your XT number and carrier code from the firmware table below. flash-all.bat does not normally touch the modemst1/modemst2 (EFS) partitions, so IMEI is rarely permanently lost from a single mismatched flash — a second, correctly matched flash typically restores network function.
For the full Fastboot error database: Fastboot Error Directory →
Frequently Asked Questions — Motorola Moto G4 Play
Go to Settings → About Phone → Model Number for the definitive XT number. The variant is also printed on the back label under the removable battery. XT1600 is a Brazil-specific build; XT1601 is the global and international model sold in Europe, India, and Canada; XT1602 targets Latin America; XT1603 was sold on Verizon in the USA; XT1604 on Cricket Wireless and AT&T GoPhone; XT1607 on TracFone, Consumer Cellular, and Straight Talk; XT1609 on Boost Mobile, Sprint, and Virgin Mobile. Each variant carries a different radio image — flashing cross-variant images corrupts the cellular baseband permanently.
Motorola supports official bootloader unlocking for the Moto G4 Play through motorola.com/unlock-bootloader, but eligibility varies. Carrier-branded variants (XT1603 Verizon, XT1604 Cricket, XT1607 TracFone, XT1609 Boost/Sprint) may be blocked by carrier policy during the subsidy period or permanently. Retail-unlocked and global devices (XT1601, XT1602) are generally unlockable immediately. The portal checks your device's IMEI against carrier agreements and returns either an unlock code or an ineligibility notice.
Yes, but only for select variants. Motorola released official Android 7.1.1 (Nougat) factory images for the XT1601 (global) variant and some regional builds. Not all seven XT variants received the 7.1.1 update — several USA carrier variants remained on Android 6.0.1. Factory images for 7.1.1, where available, can be flashed using the same Fastboot method described in this guide. Check Motorola's firmware repository for your specific XT number to confirm whether a 7.1.1 image exists before attempting an upgrade flash.
The Moto G4 Play's Qualcomm Snapdragon 410 (MSM8916) does support Qualcomm Emergency Download (EDL) mode at the hardware level. However, Motorola does not publicly distribute the Qualcomm programmer (.elf or .mbn) files required for QFIL to function. Without these programmer files, QFIL cannot communicate with the device. EDL flashing is limited to Motorola service centers that hold these proprietary files. Fastboot with Motorola's official factory images is the only publicly available and fully supported firmware restoration method for end users.
This almost always means the firmware package didn't match your device's exact XT number and carrier build — for example, flashing a WOMCL (Claro) build onto a Verizon XT1609 unit. Each carrier build carries its own radio/modem image, and a mismatch corrupts the baseband. Re-flash using the package that exactly matches both your XT number and carrier code from the firmware table below. flash-all.bat does not normally erase the modemst1/modemst2 (EFS) partitions, so a correctly matched re-flash typically restores IMEI and network function; a corrupted EFS backup on top of a mismatched flash is the rarer case that may require a Motorola service center.
Ready to Flash?
Follow the full step-by-step Fastboot guide with interactive progress tracking, prerequisite checklist, and complete troubleshooting.